
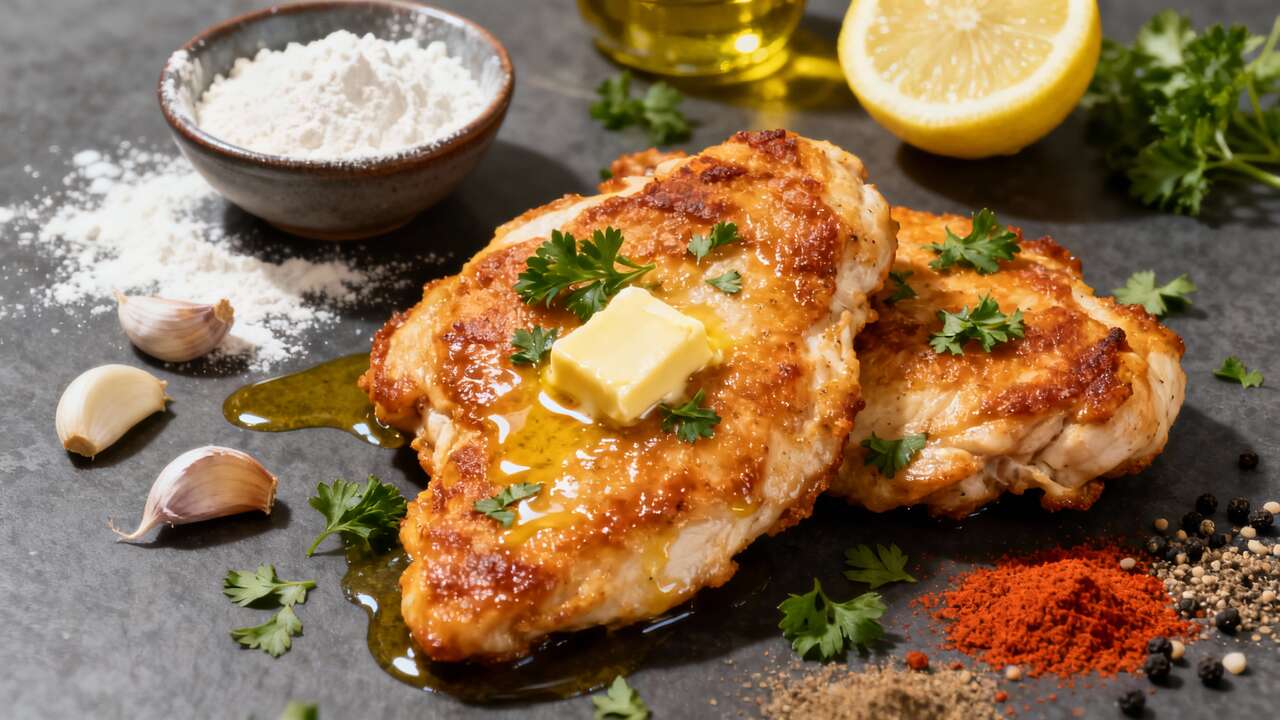

The magic of a truly memorable meal often lies not in complexity, but in the perfect harmony of simple, high-quality ingredients. This is the philosophy behind our garlic butter chicken cutlets. It’s a dish that transforms the humble chicken breast, a weeknight staple, into something genuinely spectacular. Imagine a tender, juicy chicken cutlet, pounded thin for maximum tenderness, encased in a light, seasoned crust and pan-seared to a perfect golden-brown. Now, picture it bathed in a luscious, shimmering sauce of melted butter, fragrant garlic, and a bright hint of lemon. This isn’t just dinner; it’s an experience. It’s the kind of comforting, deeply satisfying food that gathers everyone around the table. With this recipe, I’m not just giving you steps to follow; I’m inviting you into my kitchen to learn the techniques that elevate everyday cooking into a culinary art form. Prepare to master a dish that will become a permanent star in your cooking repertoire.
15 minutes
20 minutes
facile
€
Ingredients
Utensils
Preparation
Step 1
Your journey begins with preparing the chicken, a crucial step for achieving that melt-in-your-mouth texture. Place one chicken cutlet at a time inside a large zip-top bag or between two sheets of plastic wrap. This simple trick keeps your workspace clean and prevents the chicken from tearing. Using a meat mallet, a rolling pin, or even the bottom of a heavy skillet, gently pound the chicken until it reaches an even thickness of about 1/4 inch (a little more than half a centimeter). Why is this so important? An even thickness ensures that the entire cutlet cooks at the same rate. You won’t have to worry about one end being dry and overcooked while the other is still undercooked. This technique, called paillard in French cuisine, not only guarantees even cooking but also tenderizes the meat, breaking down the muscle fibers for a supremely tender result. Once all four cutlets are uniformly thin, pat them dry with paper towels. A dry surface is essential for getting that beautiful, crispy, golden-brown sear in the pan.
Step 2
Now, let’s create the flavorful coating that will form the foundation of our dish’s texture and taste. In a shallow dish or on a large plate—something wide enough to comfortably fit a chicken cutlet—combine the all-purpose flour, garlic powder, onion powder, sweet paprika, salt, and freshly ground black pepper. Use a whisk or a fork to mix these dry ingredients thoroughly, ensuring the seasonings are evenly distributed throughout the flour. This seasoned flour will do more than just add flavor; it will create a light, delicate crust on the chicken when it’s seared. This process is called dredging: the process of lightly coating a food item in a dry ingredient like flour before cooking, and it serves a dual purpose. It not only gives the chicken a wonderful texture but also helps to thicken our garlic butter sauce later on, as some of the flour will release into the pan, acting as a natural thickening agent. Don’t be shy with the seasonings here; this layer is your first opportunity to build flavor directly onto the chicken.
Step 3
With your seasoned flour ready, it’s time to coat the chicken. Take one pounded chicken cutlet and press it firmly into the flour mixture, ensuring both sides are completely and evenly coated. Gently lift the cutlet and give it a little shake to remove any excess flour. This is a key detail. While you want a full coating, a thick, pasty layer of flour will turn gummy when cooked and prevent the chicken from browning properly. You’re aiming for a thin, almost dusty layer that adheres perfectly to the surface. A light coating is all you need for a perfect crust. Set the coated cutlet on a clean plate or a wire rack and repeat the process with the remaining three cutlets. Letting them rest for a few minutes allows the flour to absorb some of the moisture from the chicken, helping it stick better during cooking.
Step 4
The sizzle of chicken hitting a hot pan is one of the most satisfying sounds in the kitchen. To achieve it, place a large skillet, preferably cast iron for its excellent heat retention, over medium-high heat. Add the olive oil and two tablespoons of the butter. Adding oil with the butter is a classic chef’s trick: the oil has a higher smoke point, which helps prevent the delicate milk solids in the butter from burning before the chicken is cooked. Once the butter is melted and foaming, it’s time to cook. Carefully place two of the chicken cutlets in the skillet, making sure not to overcrowd the pan. Overcrowding: placing too much food in a pan at once, which lowers the temperature and causes the food to steam instead of sear. Cook for about 3-4 minutes per side, or until the chicken is cooked through and a deep golden-brown. Use tongs to flip them only once to ensure a perfect crust. Transfer the cooked chicken to a clean plate and repeat with the remaining two cutlets, adding a little more oil or butter if the pan looks dry.
Step 5
Now for the grand finale: the glorious garlic butter sauce. With all the chicken cooked and set aside, reduce the heat under the skillet to medium-low. You’ll notice browned bits stuck to the bottom of the pan; this is called the fond, and it’s pure, concentrated flavor that we are about to unlock. Add the remaining four tablespoons of butter to the skillet. As it melts, use a wooden spoon or spatula to scrape up all those delicious browned bits. Once the butter is fully melted, add the minced garlic. Sauté the garlic for about 30-60 seconds, stirring constantly, until it becomes wonderfully fragrant. Be very careful here, as minced garlic can burn in an instant, which would make the sauce bitter. The moment you can smell its beautiful aroma, it’s time for the next step.
Step 6
To complete the sauce, pour in the chicken broth. This will cause a lot of steam, which is exactly what you want. This process, known as deglazing: adding liquid to a hot pan to release the browned bits of food stuck to the bottom, uses the liquid to lift all the flavorful fond from the bottom of the pan and incorporate it into your sauce. Continue scraping the bottom of the pan until it’s clean. Bring the sauce to a simmer and let it cook for a minute or two, allowing it to reduce slightly and the flavors to meld. Stir in the fresh lemon juice to add a bright, acidic note that will cut through the richness of the butter. Taste the sauce and adjust the seasoning with a little more salt and pepper if needed. Finally, return the cooked chicken cutlets to the skillet, nestling them into the sauce. Spoon some of the sauce over each cutlet. Let them simmer gently for just a minute to warm through and absorb the flavors of the sauce. Sprinkle with dried parsley and serve immediately.

Chef’s tip
For a richer, creamier sauce, you can whisk in a final tablespoon of cold butter right at the end, off the heat. This technique, known as monter au beurre in classic French cuisine, emulsifies the sauce, giving it a beautiful sheen and a velvety texture without making it heavy.
Wine pairing suggestions
A crisp, dry white wine is the perfect partner for the rich garlic butter sauce. A Sauvignon Blanc from the Loire Valley, with its zesty acidity and citrus notes, will cut through the richness beautifully. Alternatively, an unoaked or lightly oaked Chardonnay from Burgundy or California would complement the buttery notes of the dish without overpowering the delicate chicken. If you prefer red wine, choose something light-bodied with low tannins. A Pinot Noir would be an excellent choice, as its bright red fruit flavors and earthy undertones will harmonize with the savory elements of the dish.
While it feels like a timeless classic, this style of garlic butter chicken is a quintessential American comfort food, born from the tradition of simple, skillet-cooked meals. It’s a close cousin to Italian-American dishes like chicken piccata (which includes capers) and chicken francese (which involves an egg batter). What makes this version so universally loved is its focus on the elemental and irresistible pairing of garlic and butter. It embodies a core principle of great cooking: you don’t need a long list of fancy ingredients to create a dish that is profoundly satisfying. It’s a testament to how a few pantry staples, handled with the right technique, can be transformed into a meal worthy of a special occasion, yet simple enough for any Tuesday night.
- This Dried Fruit Improves Heart Health, Experts Say - 13 November 2025
- 3 Perennials You Should Divide in Autumn for a Healthier Garden Next Year - 13 November 2025
- This Simple Fruit on the Table Naturally Repels Gnats - 12 November 2025