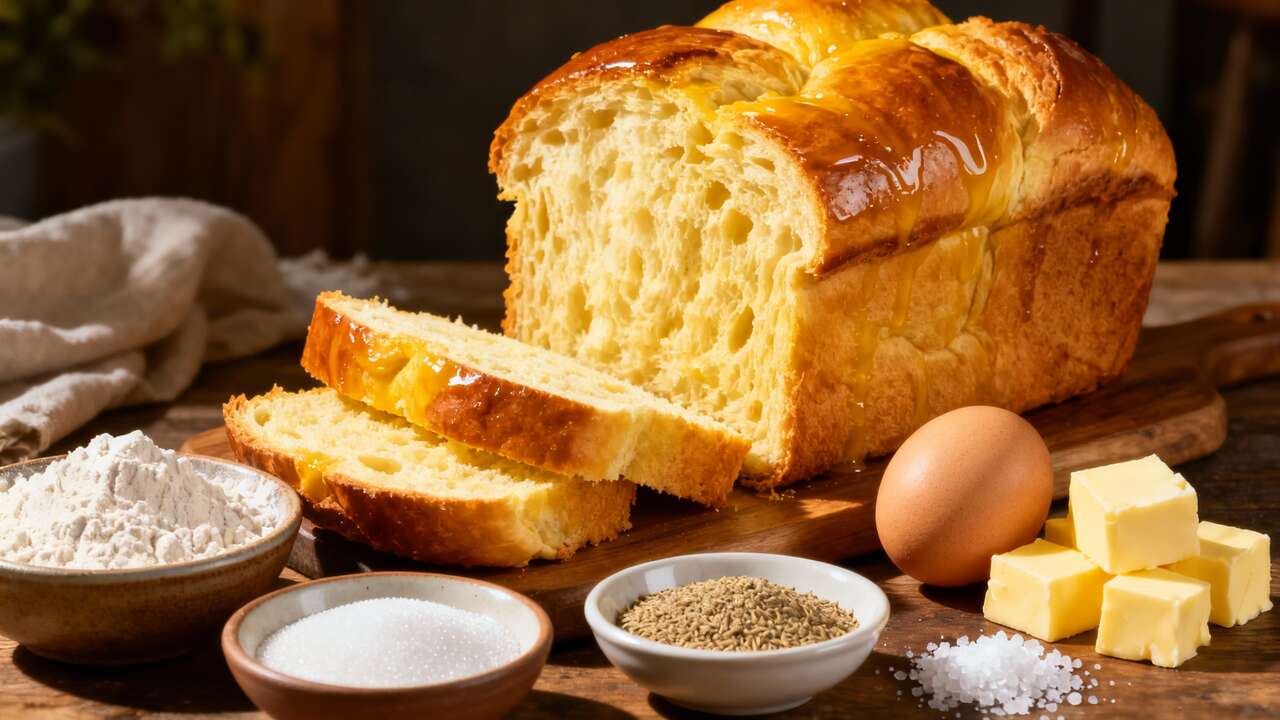

Imagine a brioche so soft it feels like a cloud, with a rich, buttery flavor that lingers on your palate. Now, imagine that same brioche staying just as soft and fresh, not for a few hours, but for several days. It sounds like a secret reserved for professional Parisian boulangeries, but it’s a trick you can master in your own kitchen. This isn’t just another brioche recipe; it’s a deep dive into the technique that will change your baking forever.
The magic lies in a simple, yet revolutionary, method known as Tangzhong. Borrowed from Asian baking traditions, this technique involves pre-cooking a small portion of the flour and liquid to create a thick paste. This simple step unlocks the flour’s ability to absorb more moisture, resulting in a dough that is easier to handle and a final product that boasts a superlatively tender crumb and an extended shelf life. Forget dry, crumbly brioche by day two. Prepare to bake a loaf that remains pillowy and delicious, ready for toasting or enjoying plain, long after it has cooled.
Follow along as we demystify this process step by step. You will not only bake the best brioche of your life but also understand the science behind its perfect texture. Let’s unlock the baker’s secret together.
45 minutes
35 minutes
moyen
€€
Ingredients
Utensils
Preparation
Step 1
First, prepare the tangzhong. In a small saucepan, whisk together 25 grams of bread flour and 65 ml of the whole milk until no lumps remain. Heat the mixture over medium-low heat, whisking constantly. You are not trying to boil it, but to gently cook it. The mixture will begin to thicken. Keep whisking until it reaches the consistency of a thick pudding and you can see lines from the whisk on the bottom of the pan. This is your tangzhong: a cooked flour-and-liquid paste that pre-gelatinizes the starches, allowing them to hold much more moisture for a softer, longer-lasting bread.
Step 2
Immediately transfer the tangzhong to a small bowl. Press a piece of plastic wrap directly onto the surface to prevent a skin from forming as it cools. Set it aside to cool down to room temperature. You can speed this up by placing it in the refrigerator for about 10 minutes.
Step 3
In the bowl of your stand mixer fitted with the dough hook, combine the 350 grams of bread flour, the granulated sugar, instant yeast, and salt. Give it a quick mix with a spoon to distribute the ingredients evenly.
Step 4
In a separate medium bowl or measuring cup, whisk together the remaining 120 ml of whole milk, the large egg, and the completely cooled tangzhong until they are well combined.
Step 5
Pour the wet mixture into the bowl with the dry ingredients. Turn the mixer on to its lowest speed and mix until all the flour is hydrated and a shaggy, sticky dough has formed. Scrape down the sides of the bowl if necessary.
Step 6
Increase the mixer speed to medium-low and let it knead the dough for a solid 10 to 15 minutes. At first, the dough will be very sticky, but as the gluten develops, it will start to pull away from the sides of the bowl and become smoother and more elastic. It’s time to check your gluten development with the windowpane test: take a small piece of dough and gently stretch it between your fingers. If you can stretch it thin enough to see light through it without it tearing, your gluten is ready for the next step. If it tears, knead for another 2-3 minutes and test again.
Step 7
Once the dough passes the initial windowpane test, reduce the mixer speed to low. Begin adding the softened, cubed butter, one piece at a time. It is very important to wait until each piece of butter is fully incorporated into the dough before adding the next. The dough may look like it’s separating or becoming greasy. Do not panic! This is normal. Just trust the process and keep the mixer running; it will all come back together into a smooth, cohesive dough.
Step 8
After all the butter has been added, increase the mixer speed to medium and continue to knead for another 5 to 8 minutes. The dough should transform into something magical: it will be incredibly smooth, shiny, soft, and will easily pull away from the sides of the bowl. It should pass the windowpane test beautifully now.
Step 9
Transfer the dough to a large, lightly oiled bowl. Cover it tightly with plastic wrap and place it in the refrigerator for a cold, slow fermentation. Let it rest for at least 8 hours, or up to 24 hours. This cold proof not only develops a much deeper, more complex flavor, but it also chills the butter within the dough, making this very soft dough much less sticky and far easier to shape.
Step 10
The next day, lightly grease a 9×5 inch (23×13 cm) loaf pan. Remove the cold dough from the refrigerator and place it on a lightly floured surface. Gently press it down to deflate it. Using a kitchen scale for accuracy, divide the dough into 4 equal pieces. Shape each piece into a tight, smooth ball by tucking the edges underneath. Arrange the four balls side-by-side in the prepared loaf pan.
Step 11
Cover the loaf pan loosely with greased plastic wrap and set it in a warm, draft-free spot to rise for its second proof. This will take about 1.5 to 2 hours, depending on the warmth of your room. The dough is ready when it has risen about 1 inch (2.5 cm) above the rim of the pan and looks puffy. When you gently poke it, the indentation should spring back slowly.
Step 12
About 30 minutes before the proofing is finished, preheat your oven to 350°F (175°C). In a small bowl, beat the remaining egg with a tablespoon of milk to create an egg wash. When the brioche is fully proofed, gently brush the top surface with the egg wash for a beautiful, shiny crust.
Step 13
Bake the brioche for 30 to 35 minutes. Halfway through baking, if you notice the top is browning too quickly, loosely tent it with a piece of aluminum foil. The brioche is done when it is a deep golden brown and an instant-read thermometer inserted into the very center reads 190°F (88°C).
Step 14
Remove the pan from the oven and let the brioche cool in the pan for about 10 minutes. Then, carefully turn the brioche out onto a wire rack to cool completely. As tempting as it is, you must resist the urge to slice into it while it’s warm. Allowing it to cool completely sets the crumb and develops the flavor, ensuring the perfect texture.

Chef’s tip
The temperature of your ingredients is critical for brioche. Ensure your egg and milk are at room temperature to encourage yeast activity. Most importantly, your butter must be softened but not melted. It should be pliable like soft clay. If it’s too cold, it won’t incorporate smoothly; if it’s too warm and greasy, it will cause the dough to separate. Perfect butter temperature is the key to a silky, not oily, dough.
Perfect Pairings
This brioche is a star on its own, but it truly sings alongside a simple, high-quality beverage. For a classic breakfast, serve a thick slice with a steaming cup of café au lait or a robust English breakfast tea. For an afternoon treat, nothing beats a square of brioche with a rich, velvety hot chocolate made from real dark chocolate.
The Science of Softness: The Tangzhong MethodThe ‘baker’s trick’ in this recipe is a technique from Asia known as tangzhong (or yudane in Japan). By cooking a small portion of the flour and liquid into a paste before adding it to the main dough, we are pre-gelatinizing the starches. What does this mean for your brioche? It means the flour can absorb and hold onto significantly more water. This super-hydrated dough results in a bread that is incredibly moist and soft right out of the oven, and miraculously, it helps the brioche resist staling, staying fresh and fluffy for days longer than a conventionally made loaf.
- This Dried Fruit Improves Heart Health, Experts Say - 13 November 2025
- 3 Perennials You Should Divide in Autumn for a Healthier Garden Next Year - 13 November 2025
- This Simple Fruit on the Table Naturally Repels Gnats - 12 November 2025