
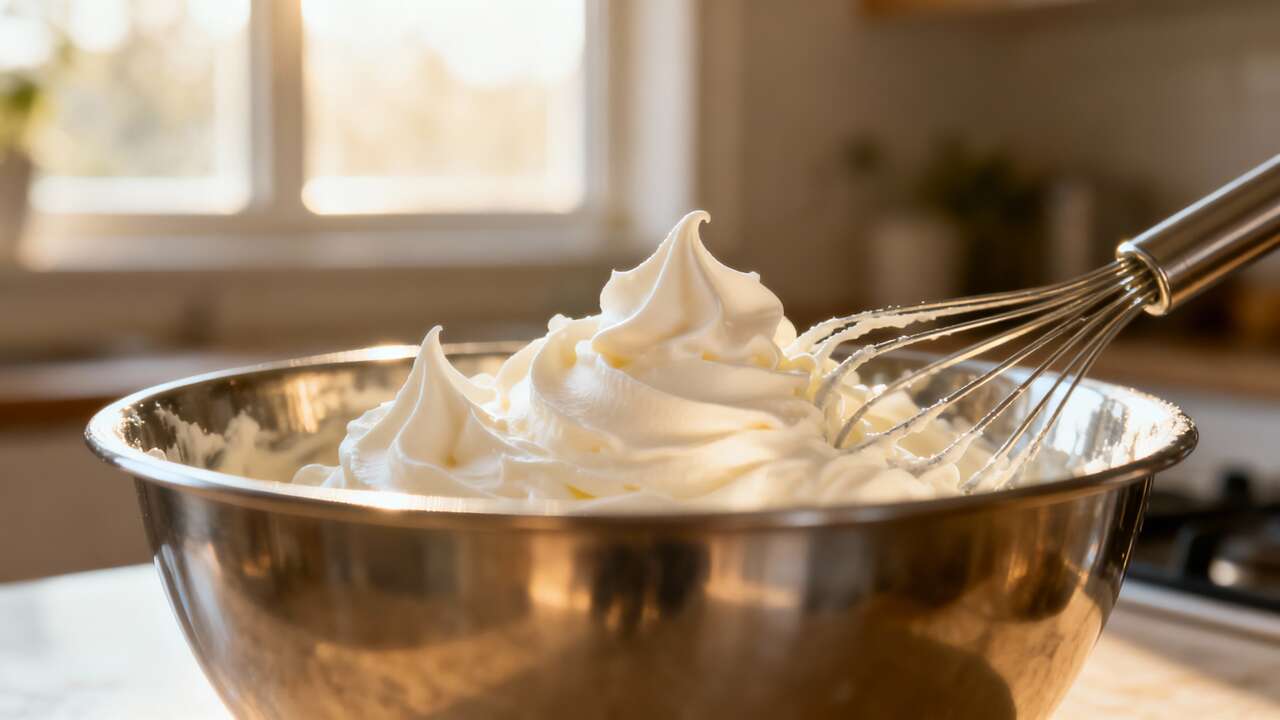

In the world of culinary arts, some of the most satisfying achievements are born from simplicity. The act of transforming liquid cream into a cloud-like confection without the roar of an electric mixer is one such feat. It is a fundamental skill that connects the cook directly to the ingredients, offering a level of control and nuance that a machine often overrides. This process is not a relic of a bygone era but a practical and rewarding technique for any modern kitchen, proving that sometimes, the best tools are the ones that have been with us all along. Mastering hand-whipped cream opens a door to fresher, more flavorful desserts and toppings, created with nothing more than a little patience and elbow grease.
Why Whip Cream By Hand ?
The Appeal of Simplicity
There is an undeniable charm in creating something delicious with minimal fuss. Whipping cream by hand epitomizes this principle. It strips away the dependency on electrical gadgets, reminding us that impressive results can stem from basic tools and techniques. The entire process requires little more than a bowl, a whisk, and a bit of arm power. This simplicity is not just about nostalgia; it is about practicality. It means you can whip up a fresh, luxurious topping anywhere, at any time, without searching for an outlet or untangling cords. It is a method that is as useful in a rustic cabin as it is in a high-tech kitchen, making it a truly universal culinary skill.
Superior Control and Texture
One of the greatest advantages of whipping by hand is the unparalleled control it offers. An electric mixer, with its powerful and rapid-fire action, can take cream from perfectly fluffy to over-whipped butter in a matter of seconds. When you whip by hand, you are intimately connected to the transformation. You can feel the resistance in the cream change as it thickens, allowing you to stop at the precise moment it reaches your desired consistency. Whether you need soft, billowy peaks for floating on hot chocolate or firm, sturdy peaks for piping onto a cake, manual whisking gives you the tactile feedback necessary to achieve perfection every single time. This level of precision is difficult to replicate with a machine.
A Practical Alternative
Beyond control and simplicity, hand-whipping is often the most practical choice. For small quantities of cream, setting up, using, and then cleaning an electric mixer can be more trouble than it is worth. A quick whisk by hand is far more efficient for a dollop on a slice of pie or a serving of berries. It is also a silent process, ideal for late-night baking or early-morning preparations when you do not want to wake the entire household. Furthermore, it is an excellent skill to have when you find yourself in a kitchen without a mixer, ensuring you are never unable to add that perfect finishing touch to a dessert. The physical engagement with the food fosters a deeper appreciation for the ingredients and the final product.
With a clear understanding of why this traditional method holds its own in the modern kitchen, the next step is to ensure you have the right equipment. The tools are few, but their quality and preparation are key to success.
Essential Tools for Success
The Classic Whisk and Bowl
The quintessential duo for hand-whipping cream is a balloon whisk and a deep bowl. The choice of these items can significantly impact the outcome. A balloon whisk, with its wide, flexible wires, is designed to incorporate a maximum amount of air into the cream with each stroke, making the process faster and more efficient. A deep, large bowl is equally important as it prevents splatters and gives you ample room to use a broad whisking motion. For best results, consider the following:
- Material: A metal or glass bowl is ideal because these materials retain cold temperatures well, which is crucial for whipping cream.
- Size: Choose a bowl that is large enough to hold at least double the volume of your liquid cream, as it will expand significantly.
- Preparation: Chill both the bowl and the whisk in the freezer for at least 15 minutes before you begin. A cold environment helps the fat globules in the cream solidify slightly, allowing them to trap air bubbles more effectively and create a stable foam.
The Unconventional Jar Method
For an even simpler, albeit less controlled, approach, a glass jar with a tight-fitting lid can work wonders. This method is particularly useful for small amounts of cream and is a fantastic way to get children involved in the kitchen. Simply pour the cold cream, sweetener, and any flavorings into the jar, secure the lid tightly, and shake vigorously. Within a few minutes, the sloshing sound will subside as the cream thickens. While it is harder to achieve perfectly stiff peaks this way, it is an incredibly fast and fun method for creating a soft, spoonable topping with virtually no cleanup.
Comparing Hand-Whipping Tools
Both the whisk-and-bowl method and the jar method have their place. The best choice depends on your specific needs for texture, volume, and involvement. The table below outlines the key differences to help you decide which tool is right for your task.
| Feature | Whisk and Bowl Method | Jar Method |
|---|---|---|
| Texture Control | Excellent; allows for precise stages from soft to stiff peaks. | Limited; best for soft to medium peaks. |
| Speed | Fast, typically 2-5 minutes depending on volume. | Very fast, often under 3 minutes for small amounts. |
| Volume Capacity | Suitable for small to large quantities. | Best for small quantities (no more than half the jar’s volume). |
| Effort Required | Moderate, requires continuous arm motion. | Moderate to high, requires vigorous shaking. |
| Cleanup | Minimal; one bowl and one whisk. | Extremely minimal; just the jar. |
Having selected the proper tools, success now hinges on what you put in them. The quality and type of your ingredients are just as critical as the equipment you use.
Selecting the Right Ingredients
Understanding Cream and Fat Content
Not all cream is created equal, and the key to voluminous, stable whipped cream lies in one crucial component: fat. The fat globules are what trap the air bubbles you incorporate through whisking, creating the light, airy structure. Without sufficient fat, the cream simply will not whip. This is why it is essential to choose the right type of cream for the job. Products like half-and-half or light cream lack the necessary fat content to form stable peaks. You must use a cream specifically labeled for whipping.
| Type of Cream | Typical Milk Fat Content | Whipping Suitability |
|---|---|---|
| Heavy Cream / Heavy Whipping Cream | 36% or more | Excellent; produces the most stable, firmest whipped cream. |
| Whipping Cream | 30% to 35% | Good; produces a lighter, softer whipped cream. |
| Light Cream / Coffee Cream | 18% to 30% | Poor; will not hold peaks. |
| Half-and-Half | 10.5% to 18% | Not suitable for whipping. |
The Role of Sweeteners
While unsweetened whipped cream has its place, most recipes call for a touch of sweetness. The type of sugar you use and when you add it matters. Powdered sugar, also known as confectioners’ sugar, is an excellent choice because it dissolves instantly and often contains a small amount of cornstarch, which acts as a stabilizer. Superfine sugar is another good option due to its fine crystals that dissolve quickly. If you only have granulated sugar, it will work, but you risk a slightly grainy texture if it does not dissolve completely. It is best to add any sweetener after the cream has begun to thicken and form soft peaks. Adding it too early can inhibit the cream’s ability to whip properly.
Flavor Enhancements
Plain sweetened whipped cream is a classic, but a simple flavor addition can elevate it to new heights. The most common addition is vanilla extract, but the possibilities are nearly endless. For best results, liquid flavorings like extracts or liqueurs should be added along with the sugar once soft peaks have formed. Dry ingredients, such as cocoa powder, instant espresso powder, or ground spices, should be sifted with the powdered sugar before being added to prevent lumps. A small amount of citrus zest can also add a bright, fresh note. Start with a small amount of flavoring and taste as you go; you can always add more, but you cannot take it away.
With the right tools and ingredients assembled, the final piece of the puzzle is the technique itself. The motions you use and your attention to the cream’s transformation are what will ultimately lead to a perfect, firm result.
Techniques for Achieving Firm Cream
The Critical Element of Temperature
We have mentioned it before, but its importance cannot be overstated: temperature is everything. Every component involved must be thoroughly chilled. Warm cream will churn, not whip, because the fat is too soft to hold its shape around the air bubbles. To set yourself up for success, follow a strict chilling regimen.
- Place your liquid heavy cream in the coldest part of your refrigerator for several hours, or until it is well chilled (around 40°F / 4°C).
- Put your metal or glass bowl and your whisk in the freezer for at least 15-20 minutes before you start.
- If your kitchen is particularly warm, you can even place your mixing bowl inside a larger bowl filled with ice water to maintain a low temperature throughout the whipping process.
This commitment to cold will make the cream whip up faster, higher, and with a much more stable structure.
Mastering the Whisking Motion
The goal of whisking is to quickly and efficiently incorporate air. While any vigorous motion will eventually work, a strategic approach yields better results. Start by tilting the bowl slightly toward you. This pools the cream, allowing the whisk to be more fully submerged. Use a combination of circular and up-and-down motions with your wrist. The circular motion helps thicken the cream, while lifting the whisk up and out of the cream with each stroke introduces more air. Maintain a brisk, steady pace. You will feel the resistance change as the cream goes from a thin liquid to a thicker, more viscous fluid, and finally to a light, airy foam.
Recognizing the Stages of Whipped Cream
Knowing when to stop is the most crucial part of the technique. Over-whipping is irreversible and will result in a grainy texture that eventually separates into butter and buttermilk. Pay close attention to the visual cues of each stage.
- Soft Peaks: When you lift the whisk, the cream will form a peak that immediately droops and melts back into itself. This stage is perfect for folding into mousses or gently spooning over desserts.
- Medium Peaks: The peaks will hold their shape better but the very tip will curl over when the whisk is lifted. This is a great all-purpose consistency.
- Stiff Peaks: The cream is thick, glossy, and holds a firm, sharp peak that points straight up without collapsing. This is the ideal stage for piping and frosting, as it will hold its shape beautifully. Stop whisking immediately once you reach this point.
Once you have mastered the technique for creating firm peaks, you may want to ensure your creation lasts. Certain tricks and additions can help your whipped cream defy gravity and time for much longer than it would on its own.
Tips for Stabilizing Whipped Cream
Why Stabilize ?
Standard whipped cream is a delicate creation. It is essentially a foam of air bubbles suspended in a network of fat and water. Over time, gravity takes its toll, and the water begins to weep out, causing the cream to deflate and become watery. Stabilization is the process of adding an ingredient that helps reinforce this structure, allowing the whipped cream to hold its shape for hours, or even days, in the refrigerator. This is essential if you are frosting a cake in advance, filling pastries like éclairs, or simply want your dessert topping to look pristine until it is served.
Natural Stabilizers
You may already have several effective stabilizers in your pantry. These are easy to use and integrate seamlessly into the whipping process.
- Powdered Sugar: As mentioned earlier, the cornstarch present in most powdered sugars acts as a mild stabilizer. Using it as your sweetener provides a small amount of structural insurance.
- Non-fat Milk Powder: Adding a tablespoon of dry milk powder per cup of cream can significantly boost stability. The proteins in the milk powder help absorb excess liquid and strengthen the cream’s structure. Whisk it in with the sugar.
- Cream of Tartar: A small pinch (about 1/8 teaspoon per cup of cream) of this acidic powder can help the proteins in the cream bond more tightly, resulting in a more stable foam. Add it once the cream starts to thicken.
Advanced Stabilization with Gelatin
For the most robust, long-lasting whipped cream, unflavored gelatin is the professional’s choice. It creates a topping so stable you can pipe intricate designs that will not wilt, even in warmer conditions. The process, known as “blooming,” is straightforward.
- Bloom the Gelatin: For every cup of heavy cream, sprinkle one teaspoon of unflavored gelatin over one tablespoon of cold water in a small, microwave-safe bowl. Let it sit for about 5 minutes until it looks like applesauce.
- Dissolve the Gelatin: Gently heat the gelatin mixture in the microwave for 5-10 seconds, just until it becomes liquid again. Do not let it boil. Let it cool slightly for a minute or two; it should be liquid but not hot.
- Incorporate into Cream: Begin whipping your cold heavy cream. Once it reaches the soft peak stage, slowly drizzle the liquid gelatin mixture into the cream while whisking continuously. Continue to whisk until you reach stiff peaks. The resulting whipped cream will be exceptionally stable.
With your perfectly firm and stable whipped cream ready, the final joy is in deciding how to use it. Its versatility extends far beyond a simple dollop on a dessert.
Ideas for Usage and Storage
Classic Pairings and Toppings
Hand-whipped cream is the quintessential finishing touch for a vast array of classic desserts. Its light, creamy texture and rich flavor provide a perfect counterbalance to other tastes and textures. It is the ideal companion for a slice of rich chocolate cake, a warm fruit crumble, or a classic pumpkin pie. A generous dollop can transform a simple bowl of fresh berries into an elegant dessert. It is also indispensable for topping hot beverages like coffee, hot chocolate, or mochas, where it slowly melts into a creamy layer. These classic uses highlight the simple luxury that fresh whipped cream brings to any dish.
Creative Culinary Applications
Beyond its role as a topping, whipped cream is a versatile ingredient within recipes. Its ability to add air and a light, creamy texture is invaluable. You can fold it into chocolate or fruit purées to create airy, no-bake mousses. It is a key component in the base of many no-churn ice creams, providing the smooth texture that is usually achieved through churning. In baking, it can be folded into pancake or waffle batter to make them incredibly light and fluffy. Do not limit its use to sweets; unsweetened whipped cream can be folded into savory chilled soups or used to enrich and lighten certain cream-based sauces, adding a surprising and decadent touch.
Proper Storage for Lasting Freshness
Proper storage is key to enjoying your homemade whipped cream for more than a few hours. Unstabilized whipped cream is best used immediately but can be stored in an airtight container in the coldest part of the refrigerator for up to 24 hours. Stabilized whipped cream, however, has a much longer lifespan. To store it effectively, place it in an airtight container and press a piece of plastic wrap directly onto the surface to prevent a skin from forming. The table below shows the expected storage life for different types of whipped cream.
| Type of Whipped Cream | Recommended Storage Time (Refrigerator) |
|---|---|
| Unstabilized | Up to 24 hours |
| Stabilized with Powdered Sugar/Milk Powder | 2 to 3 days |
| Stabilized with Gelatin | 3 to 4 days |
If your whipped cream has deflated slightly during storage, a few quick strokes with a whisk can often revive it and bring back its fluffy texture.
The ability to create perfect whipped cream by hand is a rewarding and surprisingly simple skill. By focusing on cold ingredients, selecting the right tools, and understanding the stages of whipping, anyone can produce a topping far superior to its store-bought counterparts. This technique offers not just a delicious result but also a deeper connection to the food you prepare, proving that sometimes the oldest methods remain the very best.

- This Dried Fruit Improves Heart Health, Experts Say - 13 November 2025
- 3 Perennials You Should Divide in Autumn for a Healthier Garden Next Year - 13 November 2025
- This Simple Fruit on the Table Naturally Repels Gnats - 12 November 2025