
In the world of pastry, achieving perfectly stiff, cloud-like egg whites is often seen as a culinary summit, a delicate dance between science and art. Many home bakers have faced the disappointment of weeping, collapsed meringues, attributing the failure to humidity, bad luck, or some unknown kitchen curse. But what if the secret to unshakeable, glossy peaks wasn’t a complex technique, but a single, simple addition? Today, we demystify the process. We will guide you, step by step, to create a meringue so stable and firm it could form the foundation of the most spectacular desserts. Forget everything you thought you knew about whipping egg whites; this one trick changes the game, turning a daunting task into a reliable and rewarding success. Prepare to unlock the potential of the humble egg and elevate your baking to professional heights.
25 minutes
90 minutes
moyen
€
Ingredients
Utensils
Preparation
Step 1
Begin by preparing your workspace, a crucial first step for any successful pastry endeavor. Preheat your oven to 300°F (150°C). This initial higher heat helps to set the crust of the meringue quickly. Line a large baking sheet with parchment paper. On the paper, you can draw a circle about 8 inches (20 cm) in diameter as a guide for shaping your pavlova base. It’s incredibly important to ensure your mixing bowl and whisk attachment are impeccably clean and completely free of any grease or fat. Even a tiny speck of oil or egg yolk can prevent your whites from whipping up to their full, glorious volume. You can wipe the bowl and whisk with a paper towel moistened with a little white vinegar to be absolutely certain they are pristine.
Step 2
Pour your room-temperature egg whites into the bowl of your stand mixer fitted with the whisk attachment. Starting at a low speed, begin to whip the whites. We start slowly to break down the proteins gently, creating a more stable foam structure. After about a minute, they will become foamy and opaque. At this point, add your cream of tartar. This is our magic ingredient. Cream of tartar is a mild acid that works to stabilize the egg whites, preventing the proteins from bonding too tightly and helping them hold their air and shape. Increase the mixer speed to medium-high. Continue whipping until the whites form soft peaks. This means that when you lift the whisk out of the mixture, a peak will form, but its tip will gently curl over and droop down, like a soft wave.
Step 3
This is the most critical stage, where patience is your greatest virtue. With the mixer still running on medium-high speed, begin adding the caster sugar one tablespoon at a time. Do not rush this process. Wait about 30 seconds between each addition to allow the sugar to fully dissolve into the whites before adding the next spoonful. Adding the sugar too quickly will weigh down the foam and can result in a gritty, weeping meringue. This slow, methodical addition is what builds a strong, stable, and glossy meringue structure. The entire process of adding the sugar should take at least 10 minutes. Keep whipping after all the sugar is added.
Step 4
Continue whipping for another 5 to 7 minutes after the last spoonful of sugar has been added. The mixture will transform. It will become incredibly thick, brilliantly white, and have a magnificent, satiny gloss. You are looking for stiff peaks. This means that when you lift the whisk, the peak that forms will stand straight up, holding its shape without collapsing at all. To be absolutely sure the sugar has dissolved, take a tiny bit of the meringue and rub it between your thumb and forefinger. It should feel completely smooth. If you feel any grainy sugar crystals, continue whipping for another minute or two and test again.
Step 5
Once you have perfect, stiff, glossy peaks, stop the mixer. Sift the cornstarch over the surface of the meringue and drizzle in the vanilla extract. Using a large, flexible spatula, gently fold these last ingredients into the mixture. Folding is a technique where you use the spatula to cut down through the middle of the mixture, scrape along the bottom of the bowl, and bring it up and over the top, turning the bowl as you go. Use as few strokes as possible, just until everything is combined. Over-mixing at this stage can deflate your beautiful meringue. Spoon the meringue onto your prepared baking sheet, using the circle you drew as a guide. Use the back of a spoon or a spatula to shape it into a nest, creating a slight crater in the center to hold the cream and fruit later. You can create decorative swirls and peaks around the edge for a rustic, elegant look.
Step 6
Place the baking sheet in the preheated oven and immediately reduce the temperature to 250°F (120°C). Bake for 75 to 90 minutes. The pavlova is done when the outside is dry, crisp to the touch, and a very pale cream color. Do not let it brown. The magic of a pavlova is its crisp exterior and soft, marshmallow-like interior. Once the baking time is up, turn the oven off completely, prop the oven door open with a wooden spoon, and let the pavlova cool completely inside the oven. This slow cooling process prevents it from cracking dramatically as it adjusts to the room temperature. This can take several hours, or you can even leave it overnight.
Step 7
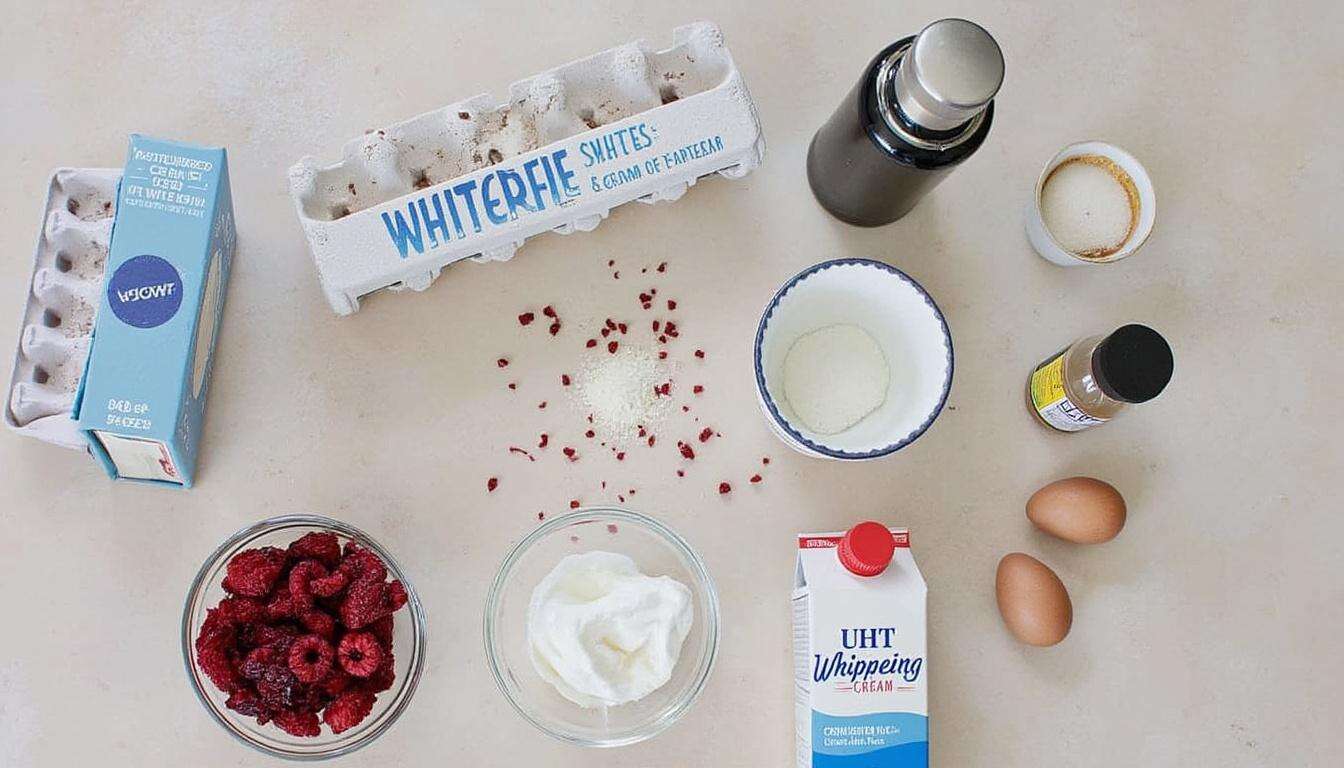
Do not assemble the pavlova until you are ready to serve it, as the moisture from the topping will begin to soften the crisp meringue shell. When ready, prepare your topping. Whip your UHT cream until it forms soft peaks. Gently spoon the cream into the crater of the cooled pavlova base. Artfully arrange your freeze-dried berries over the cream and drizzle with your fruit coulis. Serve immediately and watch your guests marvel at your creation.

Chef’s tip
For an extra layer of security against a weeping meringue, you can use a Swiss or Italian meringue method. For the Swiss method, gently heat the egg whites and sugar in your mixer bowl over a pot of simmering water, whisking constantly, until the sugar is fully dissolved and the mixture is warm to the touch (about 160°F or 70°C). Then, transfer the bowl to your mixer and whip as instructed. This pre-dissolves the sugar, guaranteeing a smooth and incredibly stable meringue.
Beverage pairing
The ethereal sweetness and crisp texture of the pavlova pair beautifully with a beverage that offers a touch of acidity and effervescence. A chilled glass of Moscato d’Asti is a classic choice, its gentle bubbles and notes of peach and apricot complementing the berry topping. For a non-alcoholic option, a sparkling elderflower pressé or a homemade iced tea infused with mint and lemon provides a refreshing, sophisticated counterpoint to the dessert’s richness.
The pavlova is a dessert steeped in a friendly rivalry between Australia and New Zealand, with both nations claiming its creation in honor of the Russian ballerina Anna Pavlova during her tour in the 1920s. Regardless of its origin, its genius lies in its texture: a crisp, delicate crust giving way to a soft, marshmallowy center. The secret we’ve shared today, the addition of an acid like cream of tartar, is pure food science. Egg whites are made of proteins, primarily one called albumin. When you whip them, you are forcing these proteins to unfold and link together, trapping air bubbles. The acid helps to stabilize this network of proteins, preventing them from tightening up too much and squeezing out the water, which is what causes a meringue to ‘weep’. It’s a small step that ensures the magnificent structure you worked so hard to create remains lofty and stable.
- This Dried Fruit Improves Heart Health, Experts Say - 13 November 2025
- 3 Perennials You Should Divide in Autumn for a Healthier Garden Next Year - 13 November 2025
- This Simple Fruit on the Table Naturally Repels Gnats - 12 November 2025