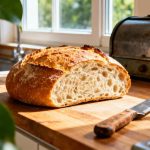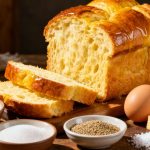


There are few things more comforting than the aroma of freshly baked bread wafting through a home. Yet, for many, achieving that perfect loaf with a shatteringly crisp crust and a soft, airy crumb seems like an elusive art form, reserved only for professional bakers with specialized equipment. What if we told you the greatest secret isn’t a fancy bread maker, but rather a simple, almost forgotten technique that relies on time, temperature, and a little bit of kitchen science? Forget intensive kneading and complicated schedules. Today, we’re pulling back the curtain on a method that will transform your kitchen into an artisan bakery. This is more than a recipe; it’s a revelation that will give you the confidence to bake stunning, delicious bread that will have everyone believing it came from a Parisian boulangerie. Prepare to unlock the secret to bread that not only tastes incredible but also sings with a satisfying crackle at the slightest touch.
20 minutes
50 minutes
facile
€
Ingredients
Utensils
Preparation
Step 1
In a large mixing bowl, combine your dry ingredients. Using a whisk, thoroughly mix the all-purpose flour, instant yeast, fine sea salt, and the diastatic malt powder. Diastatic malt powder is a secret weapon for bakers; it’s a natural ingredient made from sprouted barley that contains active enzymes. These enzymes help break down starches into simple sugars, which feeds the yeast, resulting in a better rise, a softer crumb, and a beautifully browned, flavorful crust. Ensuring these ingredients are evenly distributed is the first key to a uniform loaf.
Step 2
Pour the lukewarm water into the bowl. The water should feel just slightly warm to the touch, around 95-105°f (35-40°c). Too hot, and you risk killing the yeast; too cold, and you’ll slow down its activity. Use a spatula or even your hand to mix everything together until just combined. You are not looking for a smooth, elastic ball of dough. Instead, you should have a shaggy, sticky, messy-looking mass. Scrape down the sides of the bowl, gather the dough into a rough ball, and that’s it. Your active work is done.
Step 3
Cover the bowl tightly with plastic wrap or a reusable silicone lid. Let the bowl sit on your counter, at a comfortable room temperature, for 12 to 18 hours. Do not touch it, do not peek. During this long, slow fermentation, gluten develops all on its own, creating the structure the bread needs without any kneading. You’ll know it’s ready when the surface of the dough is dotted with bubbles and it has more than doubled in size.
Step 4
Generously flour a clean work surface and use a dough scraper to gently release the very sticky dough from the bowl. The dough will be bubbly and alive. Lightly flour the top of the dough and fold it over on itself once or twice. Then, gently cup your hands around the dough and pull it towards you, rotating it slightly after each pull. This motion creates surface tension, forming a taut skin around the dough which will help it hold its shape and rise upwards in the oven. This is called shaping. Don’t overwork it; a few gentle motions are all that’s needed.
Step 5
Place the shaped dough onto a large piece of parchment paper. If the dough feels too slack, you can use the parchment paper to lift it and place it into a bowl for its final rest, which will help it hold a rounder shape. Cover it loosely with plastic wrap or a clean kitchen towel and let it rest for another 1 to 2 hours. This final rise is called proofing. The dough is ready when it has visibly puffed up and a finger poked gently into the side leaves an indentation that springs back slowly.
Step 6
About 30 to 45 minutes before you plan to bake, place your dutch oven, with the lid on, into your oven and preheat to 450°f (230°c). Getting the pot screaming hot is non-negotiable; this is the core of the technique. The intense heat from the pot will immediately transfer to the dough, causing a rapid expansion of gases and water vapor, a phenomenon known as oven spring.
Step 7
Once the oven and pot are fully preheated, carefully remove the hot dutch oven. Use extreme caution and heavy-duty oven mitts. Take off the hot lid. Pick up your proofed dough by lifting the edges of the parchment paper and carefully lower it, paper and all, into the hot pot. Put the lid back on, and place the entire thing back into the oven.
Step 8
Bake the bread, covered, for 30 minutes. During this time, the lid traps all the steam released by the dough. This steamy environment keeps the outer crust soft, allowing the bread to rise to its full potential. After 30 minutes, carefully remove the lid. The bread will look pale but fully risen.
Step 9
Continue to bake the bread, uncovered, for another 15 to 20 minutes. This is when the crust develops its signature deep golden-brown color and incredible crispiness. The dry heat of the oven now works to wick away moisture from the surface, creating that beautiful, crackly exterior. You’ll know it’s done when it’s deeply colored and sounds hollow when you tap the bottom.
Step 10
Using oven mitts, carefully lift the bread out of the dutch oven using the parchment paper sling and place it on a wire cooling rack. You must resist the temptation to slice into it immediately. The bread is still cooking internally as it cools. Letting it rest for at least one hour allows the crumb to set properly and develops the flavor. Slicing too early can result in a gummy texture. Listen closely as it cools; you may even hear the crust crackling.

Chef’s tip
For an even more pronounced flavor, try a cold ferment. After the initial 12-18 hour rise at room temperature, place the covered bowl of dough in the refrigerator for 1 to 3 days. This cold period significantly slows down the yeast activity but allows beneficial bacteria to develop complex, tangy flavors, similar to a sourdough. When you’re ready to bake, simply take the dough out of the fridge, shape it as usual, and let it proof at room temperature for a couple of hours until it’s no longer cold to the touch before baking.
Perfect Pairings
This magnificent bread is a true chameleon, ready to accompany any meal. For a simple, sublime experience, serve a thick, warm slice with a generous spread of high-quality salted butter, allowing it to melt into the open crumb. It’s the perfect partner for a morning cup of strong coffee or a comforting bowl of soup at lunch. For an elegant appetizer, present slices on a board with a small dish of extra-virgin olive oil for dipping, perhaps infused with garlic or herbs. This pairs wonderfully with a crisp white wine like a pinot grigio or a light-bodied red such as a Beaujolais. Don’t be afraid to let the bread be the star of the show.
The no-knead method is a testament to the idea that great results often come from simplicity and patience, not complex labor. While variations of this technique have existed for centuries, it was catapulted into the modern culinary spotlight by baker Jim Lahey in 2006. The science is beautifully simple: a high-hydration dough (one with a high percentage of water) combined with a long, slow fermentation allows gluten strands to develop and align naturally, creating the chewy structure that kneading would otherwise provide. The dutch oven acts as a personal steam-injected oven, a luxury previously only available in professional bakeries. It traps the moisture from the dough, creating a humid environment that keeps the crust pliable for the initial ‘oven spring’. Removing the lid for the final part of the bake allows the dry oven air to create a crisp, golden crust through the Maillard reaction, the same chemical process responsible for the delicious browning on seared steaks and toasted marshmallows.
- This Dried Fruit Improves Heart Health, Experts Say - 13 November 2025
- 3 Perennials You Should Divide in Autumn for a Healthier Garden Next Year - 13 November 2025
- This Simple Fruit on the Table Naturally Repels Gnats - 12 November 2025