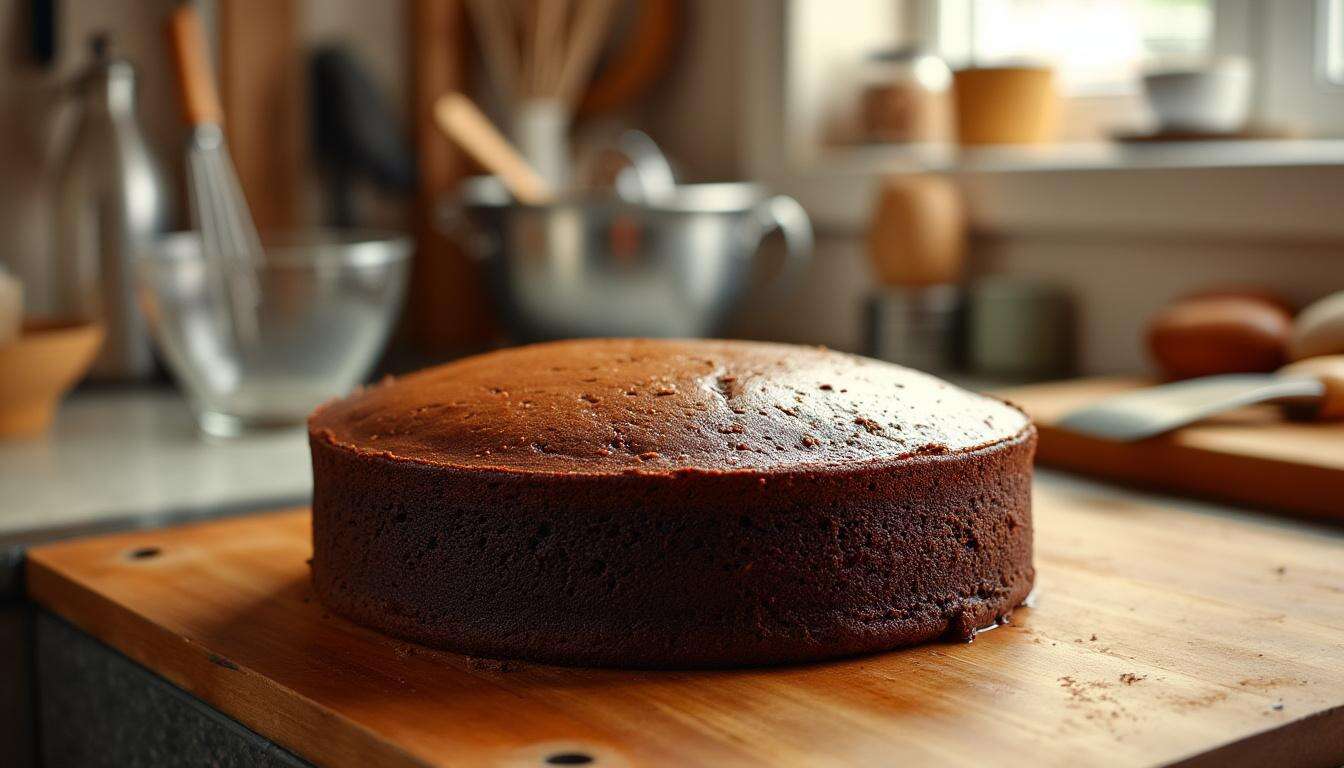

The moment of truth for any baker arrives not when the cake comes out of the oven, golden and fragrant, but a few minutes later, during the inversion. It is a moment of suspended breath, a silent plea to the baking gods that the creation will slide out cleanly, leaving nothing behind but a few crumbs. Too often, however, the result is a fractured, pockmarked dessert, with its top half stubbornly fused to the pan. While parchment paper has become the default insurance policy against this culinary heartbreak, it is far from the only solution. A combination of classic techniques and professional secrets can guarantee a perfect release every single time, rendering that roll of paper redundant.
How to keep cakes from sticking to the pan ?
The science behind sticking
Understanding why a cake sticks is the first step toward preventing it. The phenomenon is a result of a chemical reaction between the ingredients in the cake batter and the metal of the pan. When heated, the proteins and sugars in the batter form chemical bonds with the pan’s surface. This is particularly true for pans that have microscopic scratches or pores, which provide more surface area for the batter to grip. The goal of any release method is to create an impenetrable barrier between the two, preventing these bonds from ever forming.
Common preventative measures
Bakers have long relied on a trinity of methods to create this necessary barrier. These foundational techniques form the basis of nearly all non-stick strategies. While each is effective in its own right, they are often combined for maximum security. The most common approaches include:
- Greasing: Applying a layer of fat, such as butter, shortening, or oil, to the interior of the pan.
- Flouring: Dusting the greased pan with a fine layer of flour or another powder to create a secondary, dry barrier.
- Lining: Using a physical barrier, most commonly parchment paper, cut to fit the bottom and sometimes the sides of the pan.
This article focuses on mastering the first two techniques to a degree that makes the third unnecessary. The key is not just in doing them, but in doing them with precision.
Knowing the fundamental reasons a cake adheres to its pan allows for a more strategic approach. Instead of relying on a single product like parchment paper, one can craft a more robust and adaptable solution from basic pantry staples.
The alternative to parchment paper
Introducing “baker’s goop”
One of the most effective and reliable alternatives to parchment paper is a homemade pan-release paste, often referred to in baking circles as “baker’s goop” or pan grease. This is not a specific brand but rather a simple, shelf-stable emulsion that you can make at home. It combines the properties of fat and flour into a single, paintable substance. Its semi-liquid consistency allows it to be brushed into every corner and crevice of even the most intricate pans, something that is difficult to achieve with solid butter or clumsy parchment cutouts.
Recipe and preparation
Creating this powerful release agent is remarkably simple. It requires only three ingredients in equal parts by volume. The classic recipe is as follows:
- One part all-purpose flour
- One part vegetable shortening
- One part neutral vegetable oil (like canola or sunflower)
To prepare it, simply combine all three ingredients in a bowl and whisk vigorously until they form a smooth, homogenous paste with the consistency of mayonnaise. For larger batches, a stand mixer with a paddle attachment can make the process effortless. Once mixed, the paste can be stored in an airtight container in the pantry for several months or in the refrigerator for even longer.
Application and benefits
To use the paste, simply dip a pastry brush into the mixture and paint a thin, even layer over the entire interior surface of the cake pan. The primary benefit of this method is its foolproof coverage. Unlike trying to grease a fluted bundt pan with a stick of butter, the paste flows into every detail, ensuring no part of the batter makes direct contact with the metal.
| Method | Effectiveness | Convenience | Best For |
|---|---|---|---|
| Baker’s Goop | Excellent | High (make once, use many times) | Intricate pans (bundt, shaped) |
| Grease and Flour | Very Good | Moderate (two-step process) | Standard round/square pans |
| Parchment Paper | Excellent (on bottom) | Low (requires cutting) | Layer cakes, brownies |
| Oil Spray | Good | Very High | Simple, quick bakes |
The paste is not only effective but also incredibly cost-efficient compared to constantly buying rolls of parchment paper or expensive baking sprays.
While a homemade release paste offers a comprehensive solution, its effectiveness still relies on the fundamental principle of creating a fatty barrier. Understanding the nuances of choosing and applying the right fat is crucial, whether you are using a homemade paste or a more traditional method.
Tips for properly greasing the pan
Choosing the right fat
The type of fat used to grease a pan can have a significant impact on the outcome. While convenience might point toward a quick spray, different fats offer distinct advantages.
- Butter: Provides excellent flavor and helps with browning. However, its milk solids can sometimes burn and promote sticking, especially at higher temperatures. It is best for cakes baked at or below 350°F (175°C).
- Shortening: This is a baker’s favorite for a reason. It is 100% fat, with no water or milk solids, which means it has a higher smoke point and provides superior non-stick properties. Its lack of flavor is a benefit, as it will not interfere with the taste of the cake.
- Oil: Neutral oils like canola or vegetable oil are effective but can be difficult to apply evenly. They can also pool in the bottom of the pan if too much is used.
- Baking Sprays: These are convenient but often contain emulsifiers and propellants that can build up on pans over time, creating a gummy, hard-to-clean residue that ironically can cause future sticking.
For most applications, solid vegetable shortening is the most reliable choice for creating a slick, non-stick surface.
The application technique
How you apply the fat is just as important as which fat you choose. The goal is a thin, complete, and even coating. Applying too much grease is a common mistake; excess fat can pool and essentially fry the edges of the cake, resulting in a tough or greasy crust. The best method is to use a paper towel or a dedicated pastry brush to spread a small amount of softened butter or shortening over the entire interior surface of the pan. This ensures you control the thickness and reach every part of the pan without leaving thick clumps.
Proper greasing establishes the primary defense against a stuck cake. For an even more robust and fail-safe barrier, this layer of fat should be reinforced with a fine dusting of a dry ingredient.
Using flour for a perfect release
The classic grease-and-flour method
The grease-and-flour technique is a time-honored method that creates a powerful one-two punch against sticking. After thoroughly greasing the pan, add a tablespoon or two of all-purpose flour. Then, holding the pan over a sink or trash can, tilt and tap it, rotating the pan to ensure the flour coats every greased surface. Once the entire interior is covered in a fine, white layer, invert the pan and tap it firmly to remove all excess flour. You should be left with a thin, almost translucent coating, not a thick, pasty layer.
Choosing your dusting powder
While all-purpose flour is the standard, it is not the only option. Customizing the dusting powder to match the cake can elevate both its appearance and its release properties.
- For chocolate cakes: Use unsweetened cocoa powder instead of flour. This prevents the dark, rich cake from having a chalky white residue on its surface after baking.
- For nut-based cakes: A dusting of finely ground almond flour or hazelnut flour can complement the flavor of the cake and add a subtle texture to the crust.
- For angel food or chiffon cakes: Some bakers prefer to dust the pan with granulated sugar. This creates a delicate, crisp crust that releases beautifully.
This small adjustment demonstrates a higher level of baking finesse and ensures the exterior of the cake is as flawless as the interior.
This traditional combination of fat and flour is a proven workhorse in the baker’s arsenal. Yet, within this simple method, professionals employ a subtle variation that can make a surprising difference in achieving a clean release.
The experts’ secret: melted butter
Why melted butter works so well
While solid shortening is often lauded for its technical superiority, many professional bakers prefer to use butter for its flavor. To overcome the sticking potential of its milk solids, they often use it melted. Applying melted butter with a pastry brush allows for an incredibly thin and even application. More importantly, it can seep into the microscopic pores and corners of a pan far more effectively than a solid fat being smeared across the surface. This ensures that no area is left unprotected. The water content in the melted butter turns to steam and evaporates during the initial phase of baking, leaving behind a pure layer of butterfat to lubricate the pan.
The role of clarified butter
To take this technique a step further, one can use clarified butter, also known as ghee. Clarified butter is pure butterfat, with all the water and milk solids removed. This gives it the best of both worlds: the rich flavor of butter and the high smoke point and non-stick performance of shortening. Brushing a pan with clarified butter provides a superior release barrier that is virtually guaranteed not to burn or cause sticking, making it an ideal choice for cakes baked at higher temperatures or for longer durations.
Even with the most advanced preparation techniques, the laws of chemistry and physics can sometimes conspire against a baker. Knowing how to react when a cake does stick is the final piece of the puzzle.
Technique for removing a stuck cake
Patience is the primary tool
When a cake comes out of the oven, the immediate impulse is to flip it out. This is often a mistake. A cake needs time to set. The structure is extremely fragile when hot, and inverting it too soon will cause it to collapse or tear. Conversely, letting it cool completely in the pan allows the sugars to solidify and act like glue, welding the cake to the metal. The optimal window for removal is typically after it has cooled on a wire rack for 10 to 20 minutes. The cake will have firmed up, and the residual heat will keep the fats at the edge of the pan melted, aiding in the release.
Gentle persuasion methods
If the cake doesn’t release after the initial cooling period and a confident flip, do not panic or bang the pan on the counter. Resort to gentle methods first.
- Take a thin, flexible offset spatula or a butter knife and run it carefully around the perimeter of the cake, pressing it against the pan, not the cake, to break any seal that has formed.
- If the cake has a central tube, like a bundt cake, be sure to run the knife around that as well.
- Sometimes, a few gentle taps on the bottom and sides of the pan can be enough to dislodge it.
- For truly stubborn cakes, place a hot, damp kitchen towel over the bottom of the inverted pan. The steam will gently heat the pan, re-melting the solidified fats and sugars and helping the cake to release.
These steps should be approached with a light touch to avoid damaging the cake’s delicate structure.
Achieving a flawless cake release without parchment paper is not a matter of luck but of technique. By understanding the science of sticking and diligently applying a proper barrier—whether it’s a homemade paste, a meticulous grease-and-flour layer, or the professional’s choice of melted butter—bakers can approach the moment of inversion with confidence instead of apprehension. Even when a cake proves stubborn, patience and a gentle hand are the final tools needed to ensure the creation makes it to the cooling rack intact.

- This Dried Fruit Improves Heart Health, Experts Say - 13 November 2025
- 3 Perennials You Should Divide in Autumn for a Healthier Garden Next Year - 13 November 2025
- This Simple Fruit on the Table Naturally Repels Gnats - 12 November 2025